Tuesday, April 12, 2016
Sunday, February 1, 2015
How To Use Image Button In Android
Introduction:-
In this tutorial I'll show you how to use image button in android.
Implementation:-
1. Create New Android Project


In this tutorial I'll show you how to use image button in android.
Implementation:-
1. Create New Android Project
- Click File > New > New Android Project
- Add image button in your activity_main.xml file
<ImageButton
android:id="@+id/imageButton1"
android:layout_width="wrap_content"
android:layout_height="wrap_content"
android:layout_centerHorizontal="true"
android:layout_centerVertical="true"
android:src="@drawable/ic_launcher" />
- Add image button listener and toast message to show image button is clicked in your Mainactivity.xml
private ImageButton button;
//Add image button listener
button = (ImageButton) findViewById(R.id.imageButton1);
button.setOnClickListener(new View.OnClickListener() {
@Override
public void onClick(View v) {
//Add toast message to show image button clicked
Toast.makeText(getApplicationContext(), getResources().getString(R.string.toast), Toast.LENGTH_SHORT).show();
}
});
- Add in string.xml
<string name="image_button">Image Button</string>
<string name="toast">Image Button clicked</string>
2. MainActivity.java (paste this code in your MainActivity.java file)
package com.example.imagebuttonexample;
import android.support.v7.app.ActionBarActivity;
import android.os.Bundle;
import android.view.Menu;
import android.view.MenuItem;
import android.view.View;
import android.widget.Button;
import android.widget.ImageButton;
import android.widget.Toast;
public class MainActivity extends ActionBarActivity {
private ImageButton button;
@Override
protected void onCreate(Bundle savedInstanceState) {
super.onCreate(savedInstanceState);
setContentView(R.layout.activity_main);
//Add image button listener
button = (ImageButton) findViewById(R.id.imageButton1);
button.setOnClickListener(new View.OnClickListener() {
@Override
public void onClick(View v) {
//Add toast message to show image button clicked
Toast.makeText(getApplicationContext(), getResources().getString(R.string.toast), Toast.LENGTH_SHORT).show();
}
});
}
@Override
public boolean onCreateOptionsMenu(Menu menu) {
// Inflate the menu; this adds items to the action bar if it is present.
getMenuInflater().inflate(R.menu.main, menu);
return true;
}
@Override
public boolean onOptionsItemSelected(MenuItem item) {
// Handle action bar item clicks here. The action bar will
// automatically handle clicks on the Home/Up button, so long
// as you specify a parent activity in AndroidManifest.xml.
int id = item.getItemId();
if (id == R.id.action_settings) {
return true;
}
return super.onOptionsItemSelected(item);
}
}
3. activity_main.xml (paste this code in your activity_main.xml file)
<RelativeLayout xmlns:android="http://schemas.android.com/apk/res/android"
xmlns:tools="http://schemas.android.com/tools"
android:layout_width="match_parent"
android:layout_height="match_parent"
android:paddingBottom="@dimen/activity_vertical_margin"
android:paddingLeft="@dimen/activity_horizontal_margin"
android:paddingRight="@dimen/activity_horizontal_margin"
android:paddingTop="@dimen/activity_vertical_margin"
tools:context="com.example.imagebuttonexample.MainActivity" >
<ImageButton
android:id="@+id/imageButton1"
android:layout_width="wrap_content"
android:layout_height="wrap_content"
android:layout_centerHorizontal="true"
android:layout_centerVertical="true"
android:src="@drawable/ic_launcher" />
<TextView
android:id="@+id/textView1"
android:layout_width="wrap_content"
android:layout_height="wrap_content"
android:layout_above="@+id/imageButton1"
android:layout_centerHorizontal="true"
android:layout_marginBottom="38dp"
android:text="@string/image_button" />
</RelativeLayout>
4. string.xml (paste this code in your string.xml file)
<?xml version="1.0" encoding="utf-8"?>
<resources>
<string name="app_name">Image Button Example</string>
<string name="image_button">Image Button</string>
<string name="action_settings">Settings</string>
<string name="toast">Image Button clicked</string>
</resources>
5. AndroidMenifest.xml
<?xml version="1.0" encoding="utf-8"?>
<manifest xmlns:android="http://schemas.android.com/apk/res/android"
package="com.example.imagebuttonexample"
android:versionCode="1"
android:versionName="1.0" >
<uses-sdk
android:minSdkVersion="8"
android:targetSdkVersion="21" />
<application
android:allowBackup="true"
android:icon="@drawable/ic_launcher"
android:label="@string/app_name"
android:theme="@style/AppTheme" >
<activity
android:name=".MainActivity"
android:label="@string/app_name" >
<intent-filter>
<action android:name="android.intent.action.MAIN" />
<category android:name="android.intent.category.LAUNCHER" />
</intent-filter>
</activity>
</application>
</manifest>
Now run your application
Output:-
You can also download full source code .zip file.
You can also download .apk file.
How To Use Toast Message In Android
Introduction:-
In this tutorial I'll show you how to use toast message in android.
Video Tutorial:-
Video Tutorial:-
Implementation:-
Create New Android Project
1. Click File > New > Android Application Project
- Add button in your activity_main.xml file
<Button
android:id="@+id/button1"
android:layout_width="match_parent"
android:layout_height="wrap_content"
android:layout_marginTop="200dp"
android:text="@string/button" />
- Add listener in your MainActivity.java file and show toast on click
private Button button;
//Add button listener
button = (Button) findViewById(R.id.button1);
button.setOnClickListener(new View.OnClickListener() {
@Override
public void onClick(View v) {
//show toast on click
Toast.makeText(getApplicationContext(), getResources().getString(R.string.toast), Toast.LENGTH_SHORT).show();
}
});
2. MainActivity.java (paste this code in your MainActivity.java)
package com.example.toastexample;
import android.support.v7.app.ActionBarActivity;
import android.os.Bundle;
import android.view.Menu;
import android.view.MenuItem;
import android.view.View;
import android.widget.Button;
import android.widget.Toast;
public class MainActivity extends ActionBarActivity {
private Button button;
@Override
protected void onCreate(Bundle savedInstanceState) {
super.onCreate(savedInstanceState);
setContentView(R.layout.activity_main);
//Add button listener
button = (Button) findViewById(R.id.button1);
button.setOnClickListener(new View.OnClickListener() {
@Override
public void onClick(View v) {
//show toast on click
Toast.makeText(getApplicationContext(), getResources().getString(R.string.toast), Toast.LENGTH_SHORT).show();
}
});
}
@Override
public boolean onCreateOptionsMenu(Menu menu) {
// Inflate the menu; this adds items to the action bar if it is present.
getMenuInflater().inflate(R.menu.main, menu);
return true;
}
@Override
public boolean onOptionsItemSelected(MenuItem item) {
// Handle action bar item clicks here. The action bar will
// automatically handle clicks on the Home/Up button, so long
// as you specify a parent activity in AndroidManifest.xml.
int id = item.getItemId();
if (id == R.id.action_settings) {
return true;
}
return super.onOptionsItemSelected(item);
}
}
3. activity_main.xml (paste this code in your activity_main.xml)
<RelativeLayout xmlns:android="http://schemas.android.com/apk/res/android"
xmlns:tools="http://schemas.android.com/tools"
android:layout_width="match_parent"
android:layout_height="match_parent"
android:paddingBottom="@dimen/activity_vertical_margin"
android:paddingLeft="@dimen/activity_horizontal_margin"
android:paddingRight="@dimen/activity_horizontal_margin"
android:paddingTop="@dimen/activity_vertical_margin"
tools:context="com.example.toastexample.MainActivity" >
<TextView
android:id="@+id/textView1"
android:layout_width="wrap_content"
android:layout_height="wrap_content"
android:layout_alignParentTop="true"
android:layout_centerHorizontal="true"
android:layout_marginTop="144dp"
android:text="@string/hello_world" />
<Button
android:id="@+id/button1"
android:layout_width="wrap_content"
android:layout_height="wrap_content"
android:layout_alignParentLeft="true"
android:layout_alignParentRight="true"
android:layout_centerVertical="true"
android:text="@string/button" />
</RelativeLayout>
4. string.xml (paste this code in your string.xml file)
<?xml version="1.0" encoding="utf-8"?>
<resources>
<string name="app_name">ToastExample</string>
<string name="hello_world">Click to Show Toast</string>
<string name="action_settings">Settings</string>
<string name="button">Show Toast</string>
<string name="toast">Button Clicked</string>
</resources>


You can also download full source code .zip file.
Download
You can also download .apk file.
Download
button = (Button) findViewById(R.id.button1);
button.setOnClickListener(new View.OnClickListener() {
@Override
public void onClick(View v) {
//show toast on click
Toast.makeText(getApplicationContext(), getResources().getString(R.string.toast), Toast.LENGTH_SHORT).show();
}
});
2. MainActivity.java (paste this code in your MainActivity.java)
package com.example.toastexample;
import android.support.v7.app.ActionBarActivity;
import android.os.Bundle;
import android.view.Menu;
import android.view.MenuItem;
import android.view.View;
import android.widget.Button;
import android.widget.Toast;
public class MainActivity extends ActionBarActivity {
private Button button;
@Override
protected void onCreate(Bundle savedInstanceState) {
super.onCreate(savedInstanceState);
setContentView(R.layout.activity_main);
//Add button listener
button = (Button) findViewById(R.id.button1);
button.setOnClickListener(new View.OnClickListener() {
@Override
public void onClick(View v) {
//show toast on click
Toast.makeText(getApplicationContext(), getResources().getString(R.string.toast), Toast.LENGTH_SHORT).show();
}
});
}
@Override
public boolean onCreateOptionsMenu(Menu menu) {
// Inflate the menu; this adds items to the action bar if it is present.
getMenuInflater().inflate(R.menu.main, menu);
return true;
}
@Override
public boolean onOptionsItemSelected(MenuItem item) {
// Handle action bar item clicks here. The action bar will
// automatically handle clicks on the Home/Up button, so long
// as you specify a parent activity in AndroidManifest.xml.
int id = item.getItemId();
if (id == R.id.action_settings) {
return true;
}
return super.onOptionsItemSelected(item);
}
}
3. activity_main.xml (paste this code in your activity_main.xml)
<RelativeLayout xmlns:android="http://schemas.android.com/apk/res/android"
xmlns:tools="http://schemas.android.com/tools"
android:layout_width="match_parent"
android:layout_height="match_parent"
android:paddingBottom="@dimen/activity_vertical_margin"
android:paddingLeft="@dimen/activity_horizontal_margin"
android:paddingRight="@dimen/activity_horizontal_margin"
android:paddingTop="@dimen/activity_vertical_margin"
tools:context="com.example.toastexample.MainActivity" >
<TextView
android:id="@+id/textView1"
android:layout_width="wrap_content"
android:layout_height="wrap_content"
android:layout_alignParentTop="true"
android:layout_centerHorizontal="true"
android:layout_marginTop="144dp"
android:text="@string/hello_world" />
<Button
android:id="@+id/button1"
android:layout_width="wrap_content"
android:layout_height="wrap_content"
android:layout_alignParentLeft="true"
android:layout_alignParentRight="true"
android:layout_centerVertical="true"
android:text="@string/button" />
</RelativeLayout>
4. string.xml (paste this code in your string.xml file)
<?xml version="1.0" encoding="utf-8"?>
<resources>
<string name="app_name">ToastExample</string>
<string name="hello_world">Click to Show Toast</string>
<string name="action_settings">Settings</string>
<string name="button">Show Toast</string>
<string name="toast">Button Clicked</string>
</resources>
5. AndroidManifest.xml
<?xml version="1.0" encoding="utf-8"?>
<manifest xmlns:android="http://schemas.android.com/apk/res/android"
package="com.example.toastexample"
android:versionCode="1"
android:versionName="1.0" >
<uses-sdk
android:minSdkVersion="8"
android:targetSdkVersion="21" />
<application
android:allowBackup="true"
android:icon="@drawable/ic_launcher"
android:label="@string/app_name"
android:theme="@style/AppTheme" >
<activity
android:name=".MainActivity"
android:label="@string/app_name" >
<intent-filter>
<action android:name="android.intent.action.MAIN" />
<category android:name="android.intent.category.LAUNCHER" />
</intent-filter>
</activity>
</application>
</manifest>
Now run your application
Output:-
Download
You can also download .apk file.
Download
Saturday, January 31, 2015
How To Use Button In Android
Introduction:-
In this tutorial I'll show you how to use normal button, add a click listener , when user click on button open an URl on your android's browser.
Video Demo:-
Implementation:-
Create New Android Project
1. Click File > New > Android Application Project

package com.example.buttoneample;
import android.support.v7.app.ActionBarActivity;
import android.content.Intent;
import android.net.Uri;
import android.os.Bundle;
import android.view.Menu;
import android.view.MenuItem;
import android.view.View;
import android.widget.Button;
public class MainActivity extends ActionBarActivity {
private Button button;
@Override
protected void onCreate(Bundle savedInstanceState) {
super.onCreate(savedInstanceState);
setContentView(R.layout.activity_main);
// Add button listener
button = (Button) findViewById(R.id.button1);
button.setOnClickListener(new View.OnClickListener() {
@Override
public void onClick(View v) {
Intent browserIntent = new Intent(Intent.ACTION_VIEW, Uri
.parse("http://www.androidfriction.blogspot.com"));
startActivity(browserIntent);
}
});
}
@Override
public boolean onCreateOptionsMenu(Menu menu) {
// Inflate the menu; this adds items to the action bar if it is present.
getMenuInflater().inflate(R.menu.main, menu);
return true;
}
@Override
public boolean onOptionsItemSelected(MenuItem item) {
// Handle action bar item clicks here. The action bar will
// automatically handle clicks on the Home/Up button, so long
// as you specify a parent activity in AndroidManifest.xml.
int id = item.getItemId();
if (id == R.id.action_settings) {
return true;
}
return super.onOptionsItemSelected(item);
}
}
3. activity_main.xml (Paste this code in your activity_main.xml)
<RelativeLayout xmlns:android="http://schemas.android.com/apk/res/android"
xmlns:tools="http://schemas.android.com/tools"
android:layout_width="match_parent"
android:layout_height="match_parent"
android:paddingBottom="@dimen/activity_vertical_margin"
android:paddingLeft="@dimen/activity_horizontal_margin"
android:paddingRight="@dimen/activity_horizontal_margin"
android:paddingTop="@dimen/activity_vertical_margin"
tools:context="com.example.buttoneample.MainActivity" >
<Button
android:id="@+id/button1"
android:layout_width="match_parent"
android:layout_height="wrap_content"
android:layout_marginTop="200dp"
android:text="@string/button" />
</RelativeLayout>


In this tutorial I'll show you how to use normal button, add a click listener , when user click on button open an URl on your android's browser.
Video Demo:-
Implementation:-
Create New Android Project
1. Click File > New > Android Application Project
- Add button in your activity_main.xml file
<Button
android:id="@+id/button1"
android:layout_width="match_parent"
android:layout_height="wrap_content"
android:layout_marginTop="200dp"
android:text="@string/button" />
- Add listener in your MainActivity.java file
private Button button;
// Add button listener
button = (Button) findViewById(R.id.button1);
button.setOnClickListener(new View.OnClickListener() {
@Override
public void onClick(View v) {
Intent browserIntent = new Intent(Intent.ACTION_VIEW, Uri
.parse("http://www.androidfriction.blogspot.com"));
startActivity(browserIntent);
}
});
2. MainActivity.java (Paste this code in your MainActivity.java)
import android.support.v7.app.ActionBarActivity;
import android.content.Intent;
import android.net.Uri;
import android.os.Bundle;
import android.view.Menu;
import android.view.MenuItem;
import android.view.View;
import android.widget.Button;
public class MainActivity extends ActionBarActivity {
private Button button;
@Override
protected void onCreate(Bundle savedInstanceState) {
super.onCreate(savedInstanceState);
setContentView(R.layout.activity_main);
// Add button listener
button = (Button) findViewById(R.id.button1);
button.setOnClickListener(new View.OnClickListener() {
@Override
public void onClick(View v) {
Intent browserIntent = new Intent(Intent.ACTION_VIEW, Uri
.parse("http://www.androidfriction.blogspot.com"));
startActivity(browserIntent);
}
});
}
@Override
public boolean onCreateOptionsMenu(Menu menu) {
// Inflate the menu; this adds items to the action bar if it is present.
getMenuInflater().inflate(R.menu.main, menu);
return true;
}
@Override
public boolean onOptionsItemSelected(MenuItem item) {
// Handle action bar item clicks here. The action bar will
// automatically handle clicks on the Home/Up button, so long
// as you specify a parent activity in AndroidManifest.xml.
int id = item.getItemId();
if (id == R.id.action_settings) {
return true;
}
return super.onOptionsItemSelected(item);
}
}
3. activity_main.xml (Paste this code in your activity_main.xml)
<RelativeLayout xmlns:android="http://schemas.android.com/apk/res/android"
xmlns:tools="http://schemas.android.com/tools"
android:layout_width="match_parent"
android:layout_height="match_parent"
android:paddingBottom="@dimen/activity_vertical_margin"
android:paddingLeft="@dimen/activity_horizontal_margin"
android:paddingRight="@dimen/activity_horizontal_margin"
android:paddingTop="@dimen/activity_vertical_margin"
tools:context="com.example.buttoneample.MainActivity" >
<Button
android:id="@+id/button1"
android:layout_width="match_parent"
android:layout_height="wrap_content"
android:layout_marginTop="200dp"
android:text="@string/button" />
</RelativeLayout>
4. string.xml (Paste this code in your string.xml)
<resources>
<string name="app_name">ButtonEample</string>
<string name="hello_world">Hello world!</string>
<string name="action_settings">Settings</string>
<string name="button">Click Button</string>
</resources>
5. AndroidMenifest.xml
<?xml version="1.0" encoding="utf-8"?>
<manifest xmlns:android="http://schemas.android.com/apk/res/android"
package="com.example.buttoneample"
android:versionCode="1"
android:versionName="1.0" >
<uses-sdk
android:minSdkVersion="8"
android:targetSdkVersion="21" />
<application
android:allowBackup="true"
android:icon="@drawable/ic_launcher"
android:label="@string/app_name"
android:theme="@style/AppTheme" >
<activity
android:name=".MainActivity"
android:label="@string/app_name" >
<intent-filter>
<action android:name="android.intent.action.MAIN" />
<category android:name="android.intent.category.LAUNCHER" />
</intent-filter>
</activity>
</application>
</manifest>
Output:-
You can also download full source code with .zip file.
OR you can also download .apk file.
Wednesday, January 28, 2015
How to develop wallpapers application
If you are photographer, And want to become famous over the world by showing your photography skills through android application.
But the problem is how to/who will create android application...??
Just relax i will create android application and provide you fully published brand new android application in Google play store just for you.
App name :- As you want (like : example_name's photography)


Video:-
But the problem is how to/who will create android application...??
Just relax i will create android application and provide you fully published brand new android application in Google play store just for you.
App name :- As you want (like : example_name's photography)
Data(photos):- What ever you want to show to the user.
Application Details:-
- This application will be an photography application.
- In this application only you can show your images/photos.
- You can also categorized your images like :- Animals, Cars, Foods etc.
- I will provide you unique "ID" and "password" for application.
- Application content can only modified by owner of the application(who have the unique ID and password).
Sample Application:-
(Your application will look alike this)
Sample App OR
(But the application name, icon and categories will not the same , it will different(as you want))
Some Screen Shots:-
Video:-
For more details contact us ;)
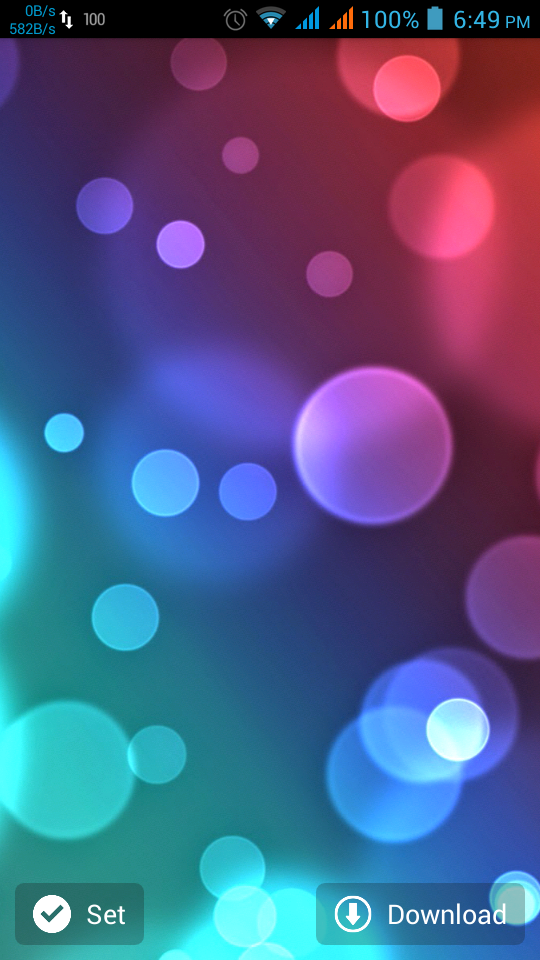
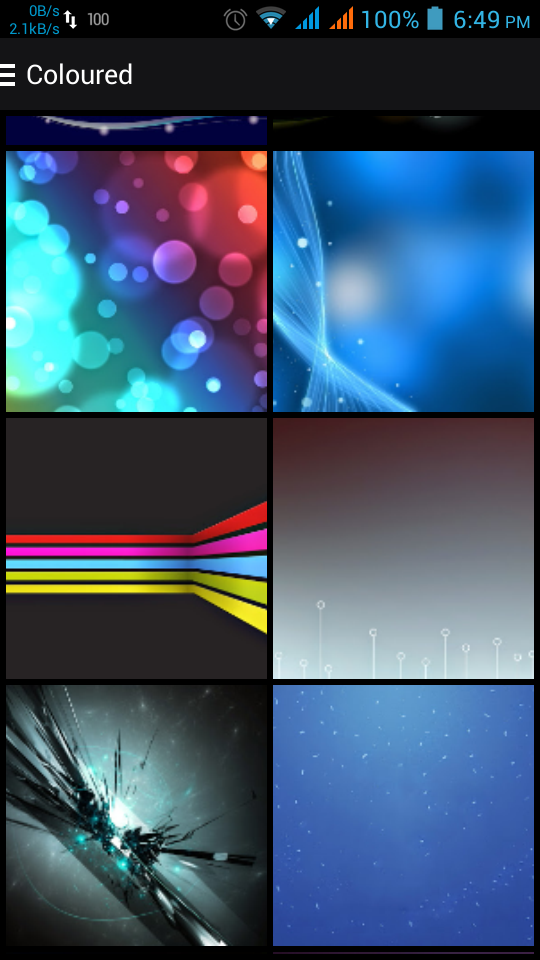
HD Wallpapers
Make your home screen more beautiful and more attractive by using HD Wallpapers application.
Which provides you more than 10,000 high resolution wallpaper absolutely free without any charge
Check out "HD Wallpapers" - https://play.google.com/store/apps/details?id=com.dev.hdwallpapers
If any one is interested to share his content with this application Please contact us. :-)
Video:-
Screen Shots:-
Tuesday, January 27, 2015
How to develop android appliation
This tutorial is very short and only for Android Beginners. In this tutorial I'll explain how to develop simple mobile android app and how to use TextView in android app.
Before starting this tutorial make sure you have knowledge about following concept:-
>> Basic Knowledge of Java concepts
>> Basic knowledge of XML concepts
Prerequisites
Before you start this tutorial, be sure you have your development environment set up. You need to :-
1. Download Android Studio.
2. After downloading Android Studio you will get an .exe(name: android-studio-bundle- 135.1641136.exe) file in the Download folder.
3. Run .exe file and install Android Studio.
4. Download the latest SDK tools and Platforms using the SDK Manager.
5. Now start Android Studio.
1.Create New Project


Then click finish,
After click finish your screen will look similar to that screen:-

2.Anatomy of an Android Application
First, note the various files that make up an Android project. Lets see what we have and their importance.


Note:- if you want to run your sample application in android device make sure you have connected you device through usb and all the necessary drivers are installed in your system.


Before starting this tutorial make sure you have knowledge about following concept:-
>> Basic Knowledge of Java concepts
>> Basic knowledge of XML concepts
Prerequisites
Before you start this tutorial, be sure you have your development environment set up. You need to :-
1. Download Android Studio.
2. After downloading Android Studio you will get an .exe(name: android-studio-bundle- 135.1641136.exe) file in the Download folder.
3. Run .exe file and install Android Studio.
4. Download the latest SDK tools and Platforms using the SDK Manager.
5. Now start Android Studio.
1.Create New Project
- Open File
- New Project
- Choose Application Name
- Select the form factors your app will run on
- Select an activity
- Choose file name for your new file
Then click finish,
After click finish your screen will look similar to that screen:-
2.Anatomy of an Android Application
First, note the various files that make up an Android project. Lets see what we have and their importance.
- Java:- Contains the .java source files for your project. In this tutorial, there is one file, MainActivity.java. The MainActivity.java file is the source file for your activity. You will write the code for your application in this file.
- AndroidManifest.xml:- This is the manifest file for your Android application. Here you specify the permissions needed by your application, as well as other features (such as intent-filters, receivers, etc. ).
- res:- This folder contains all the resources used in your application. It also contains a few other sub-folders: drawable-<resolution>, layout, and values.
3. Java
- MainActivity
package com.dev.myapplication;
import android.support.v7.app.ActionBarActivity;
import android.os.Bundle;
import android.view.Menu;
import android.view.MenuItem;
public class MainActivity extends ActionBarActivity {
@Override
protected void onCreate(Bundle savedInstanceState) {
super.onCreate(savedInstanceState);
setContentView(R.layout.activity_main);
}
@Override
public boolean onCreateOptionsMenu(Menu menu) {
// Inflate the menu; this adds items to the action bar if it is present.
getMenuInflater().inflate(R.menu.menu_main, menu);
return true;
}
@Override
public boolean onOptionsItemSelected(MenuItem item) {
// Handle action bar item clicks here. The action bar will
// automatically handle clicks on the Home/Up button, so long
// as you specify a parent activity in AndroidManifest.xml.
int id = item.getItemId();
//noinspection SimplifiableIfStatement
if (id == R.id.action_settings) {
return true;
}
return super.onOptionsItemSelected(item);
}
}
4. res
- activity_main.xml
<RelativeLayout xmlns:android="http://schemas.android.com/apk/res/android"
xmlns:tools="http://schemas.android.com/tools" android:layout_width="match_parent"
android:layout_height="match_parent" android:paddingLeft="@dimen/activity_horizontal_margin"
android:paddingRight="@dimen/activity_horizontal_margin"
android:paddingTop="@dimen/activity_vertical_margin"
android:paddingBottom="@dimen/activity_vertical_margin" tools:context=".MainActivity">
<TextView android:text="@string/hello_world" android:layout_width="wrap_content"
android:layout_height="wrap_content" />
</RelativeLayout>
Here we are using an TextView and Its attributes. Attributes help to define TextView height, width, id, text(what you want to show).
5. AndroidMenifest.xml
- AndroidMenifest.xml
<?xml version="1.0" encoding="utf-8"?>
<manifest xmlns:android="http://schemas.android.com/apk/res/android"
package="com.dev.myapplication" >
<application
android:allowBackup="true"
android:icon="@drawable/ic_launcher"
android:label="@string/app_name"
android:theme="@style/AppTheme" >
<activity
android:name=".MainActivity"
android:label="@string/app_name" >
<intent-filter>
<action android:name="android.intent.action.MAIN" />
<category android:name="android.intent.category.LAUNCHER" />
</intent-filter>
</activity>
</application>
</manifest>
6. Values
- string.xml
<?xml version="1.0" encoding="utf-8"?>
<resources>
<string name="app_name">My Application</string>
<string name="hello_world">Hello world!</string>
<string name="action_settings">Settings</string>
</resources>
Here we define all the text values.
7. Now run your app
You can run your sample app in Android Virtual Device(Emulator) and also in your android device.
How to create Android Virtual Device(Emulator):-
- Click on AVD icon

- Create virtual device
- Select hardware
- Select system image
- Verify configuration
- And, then click finish
How to use my android device as Emulator:-
- Go to your settings
- Click on about phone
- Then, click on "Build number" multiple time till the developer option available on your settings
- Click on developer options and check USB debugging.
Note:- if you want to run your sample application in android device make sure you have connected you device through usb and all the necessary drivers are installed in your system.
After click on run you will get output screen:-
If you want change the output from "Hello world" to "example_name" make some changes in your string.xml file.
- Go to values folder
- Open string.xml
string.xml
<?xml version="1.0" encoding="utf-8"?>
<resources>
<string name="app_name">My Application</string>
<string name="hello_world">Hello world!</string>
<string name="action_settings">Settings</string>
</resources>
- Make some changes
<?xml version="1.0" encoding="utf-8"?>
<resources>
<string name="app_name">My Application</string>
<string name="hello_world">Example_Name</string>
<string name="action_settings">Settings</string>
</resources>
Output:-
Subscribe to:
Posts (Atom)